LINKED WORKSETS & TEMPORARY DIMENSIONS
LINKED WORKSETS
I think you will recognize the annoyance when you link several models to your Revit model, copy over some Levels and all the Grids from the architectural or other model that is in the lead for Levels and Grids and you have created several sections, that you see also all the Levels and Grids of the linked models in your Views?
PROBLEM
Turning off these Levels and Grids of all the linked files in every View where they show up or if you use View templates for your Views you have to run through every View template to turn the Levels and Grids off for the linked files is a tedious task. There is a simple way of controlling the visibility of all Levels and Grids of the linked files in all your Views.
SOLUTION
When your linked models are already Central files just go to the Manage links files.
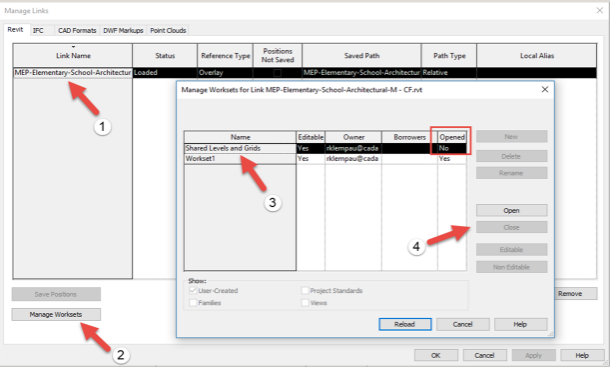
Select the link
Click the ‘Manage Workset’ button
In the Manage Workset dialog select the link
Click the ‘Close’ button.
Then click ‘Reload’ and click the ‘OK’ button in the Manage Links dialog box.
RESULTS
• You will see that all Levels and Grids of that linked file are not visible anymore in your entire project file.
• If you are using multiple worksets to control visibility of elements you may choose other worksets you desired to be turned off in the entire project.
TEMPORARY DIMENSIONS
PROBLEM
When you click on an element in Revit it will show a temporary dimension to a nearest wall. The problem is when ever these dimensions show they are so small and depending what other items you have in your view its hard to see.
SOLUTION
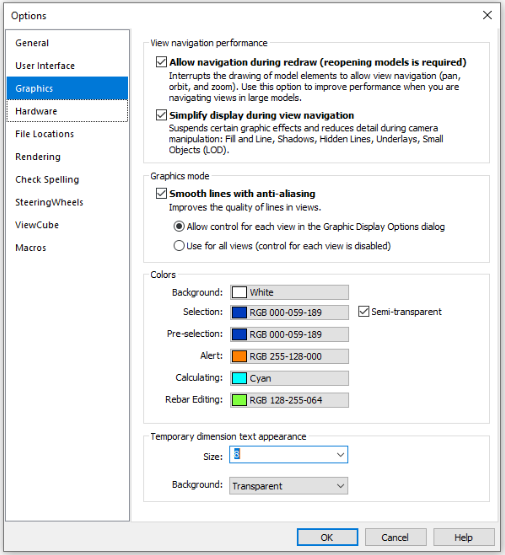
Go to the FILE tab
Go to OPTIONS
Click on Graphics
Scroll down to Temporary Dimension Text Appearance
Default is set to the smallest change to which ever size you feel comfortable with. Size 12 or 14 is typically good
RESULTS
Now when you click on an element in Revit the temporary dimension should be at a more readable size